Apple Galette
This easy Apple Galette is the perfect light fall dessert! This sweet treat has a buttery, store-bought crust with warm cinnamon baked apples. It’s a simple freeform apple pie the whole family will love!
Fruit Galette with Apples
This easy Apple Galette recipe has all the flavor of your classic apple pie, but it’s easier and quicker! Tender, sweet apples, warm cinnamon syrup, and an easy, flaky crust all come together to create a rustic, delicious fall dessert. This galette won’t take up fridge space around the holidays, and you can freeze it up to 2 months beforehand for a convenient go-to dessert!
Galette vs. Pie vs. Tart
What’s the difference? Pies get all the hype. We bake them in a sloped baking dish, and most apple pies have two crusts (one on top, one on bottom). Tarts are a bakery favorite. They have a shorter crust pressed into a baking dish with a removable bottom (so it can be presented without the dish). Galettes are the delicious, lesser known cousin to these two!
Galettes use only one crust (same type as a pie crust), and they’re formed by hand and baked on a baking sheet. We gently fold the dough of the crust over the filling, creating a rustic-looking pie with a large opening for the filling to show. Both pies and tarts should be kept in the fridge after several hours, but fruit galettes can be kept at room temperature for days. These freeform pies can even be made savory!
In short, galettes are…
- Easier – One dough is always easier to work with than two! Plus, there’s a bit less filling, so it’s simpler to work with. Galettes are more like a free form pastry and are meant to be more rustic, so you don’t need to feel pressured to spend time arranging an elaborate pattern like you might for a tart.
- Quicker – Both pies and tarts usually need 55-75 minutes to bake while this galette needs just 45. The store-bought dough makes our prep quicker, and only needing 1 crust speeds up our work!
- More convenient – Not needing to stuff leftovers into a packed fridge AND not needing to keep this dish warm or cold during transport makes this recipe perfect for the holidays! These travel well and don’t require a lot of fuss.
Apple Galette Ingredients
Here’s a quick overview of what you’ll need for this recipe. You’ll find exact measurements in the printable recipe card at the bottom of the page.
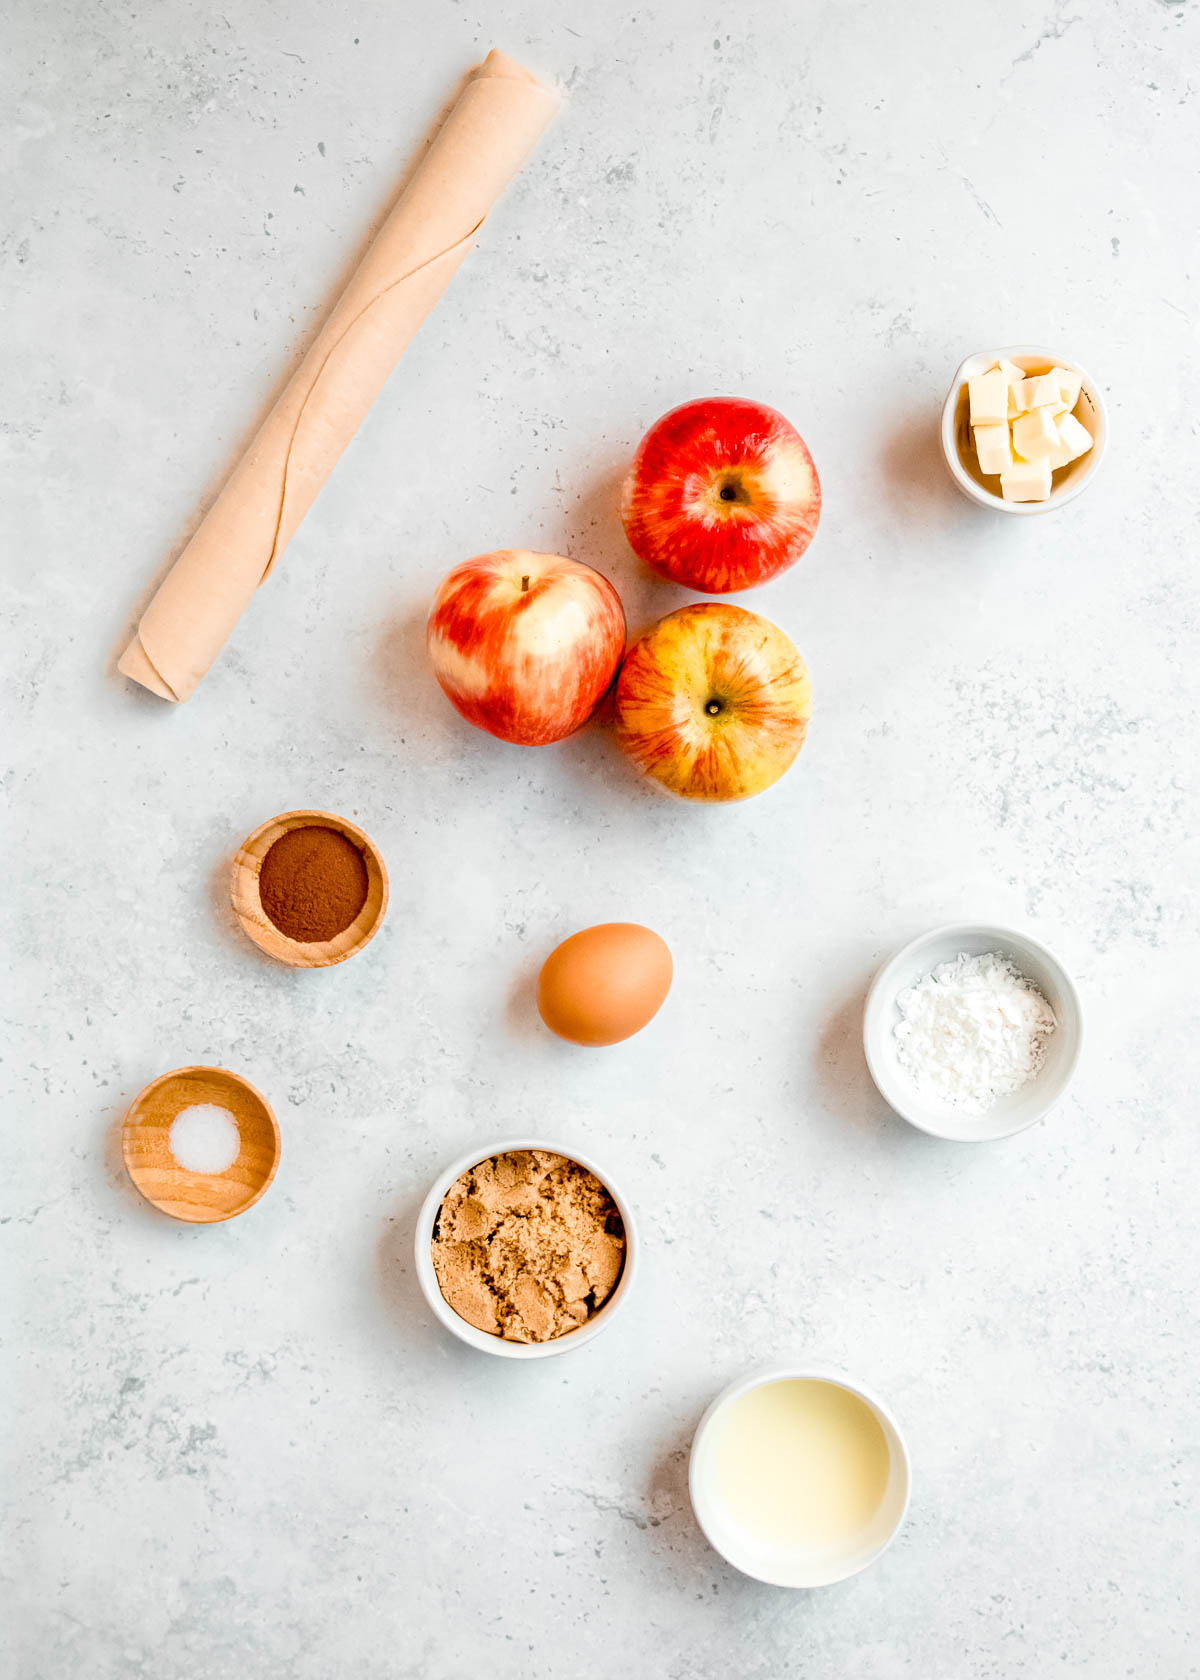
- Pie crust – This should be the refrigerated, rolled pie crust that frequently comes in a 2-pack. Gluten-free store-bought crusts can be super convenient for this.
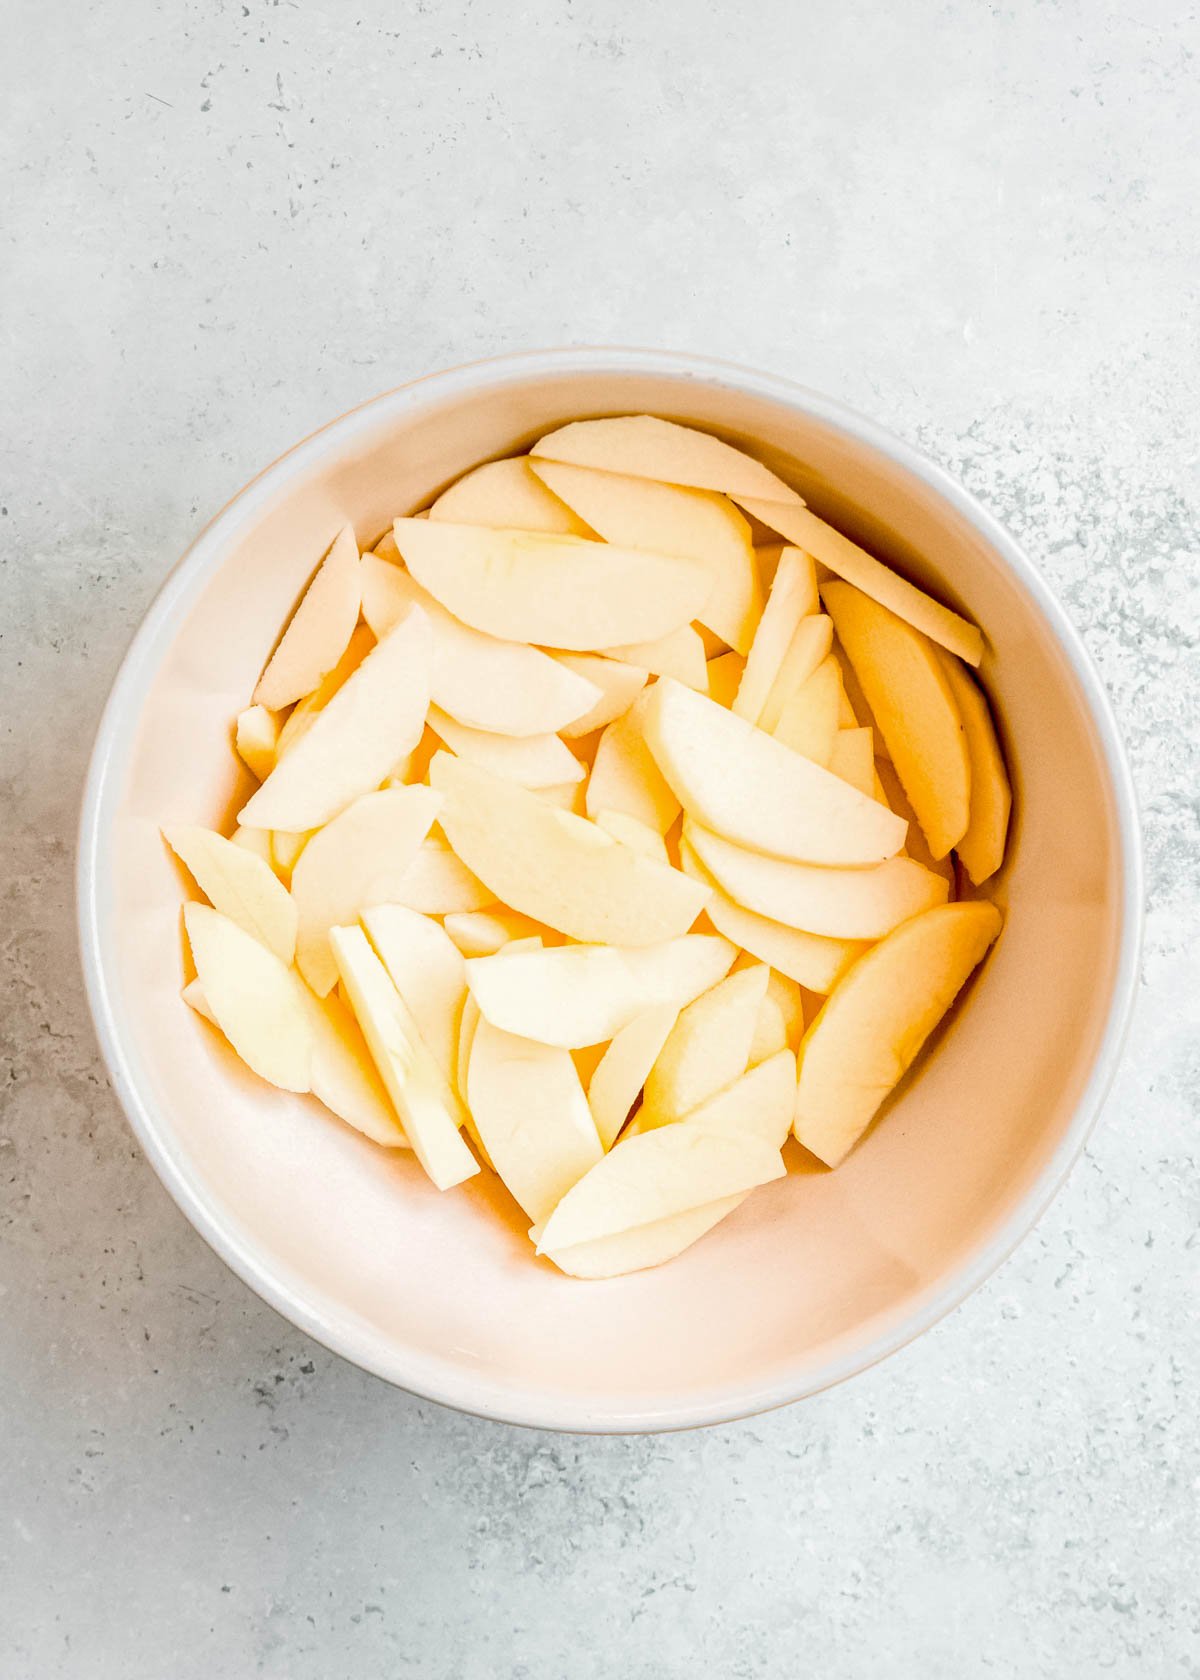
- Apples – Medium sized. I used honeycrisp apples, but Gala, Fiji, even Granny Smith apples would be great! You could even try a mix of several varieties or even use a pear for a twist. Feel free to slice apples 1-2 days ahead of time and store them in an airtight container in the fridge.
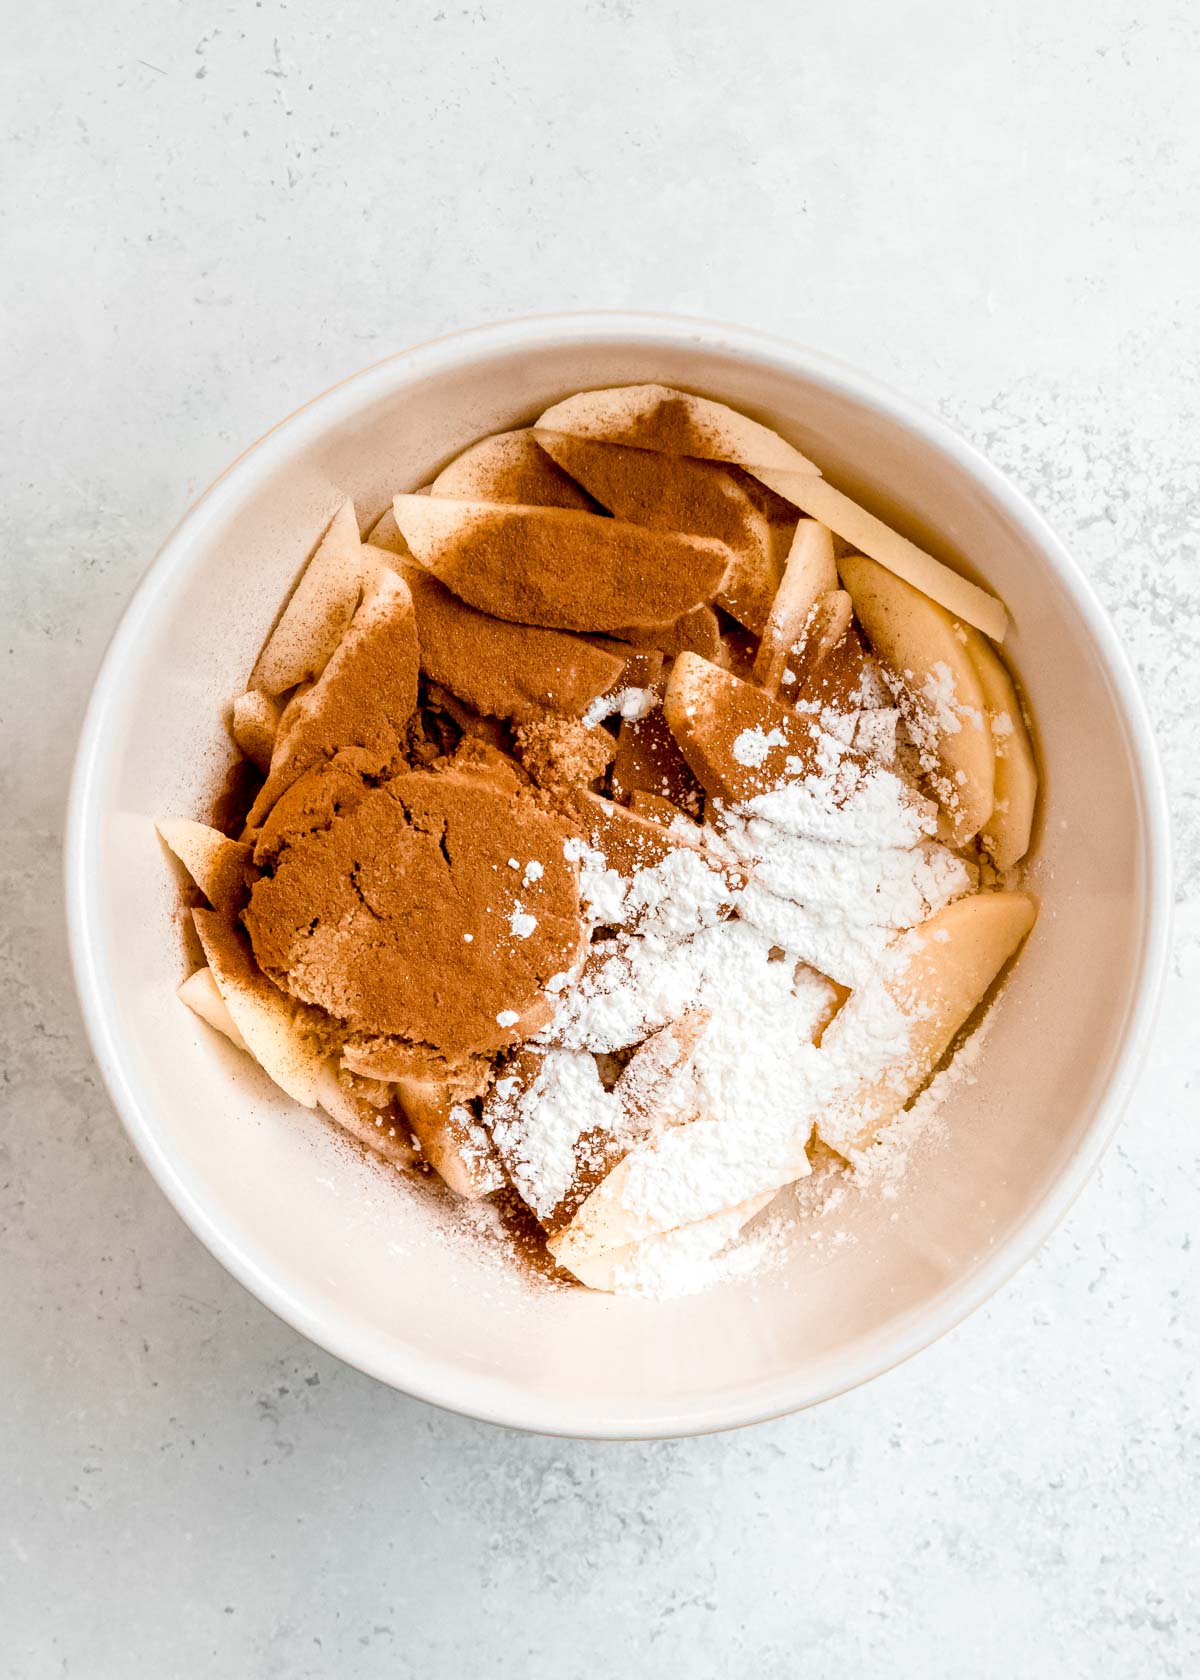
- Brown sugar, Lemon juice, Cornstarch, Cinnamon, and Salt – The apples are tossed in this for added flavor. Fresh lemon juice always has a great flavor, but bottled juice is great for convenience.
- Egg + Water – This is mixed together for an egg wash. This creates a lovely, browned, crisp crust with a great texture! If you’re egg free, you can brush with milk, cream, or melted butter.
- Unsalted butter – This is cut up into small cubes and left to melt over the apples as the galette bakes. I haven’t tried any butter substitutes.
For this recipe, you’ll also need a baking sheet lined with parchment paper or silicone liners, some mixing bowls, a whisk, and an oven.
How to make an apple galette
This simple galette gives you all the flavor of a classic pie without a lot of the fuss. You don’t even need a rolling pin or pie dish for this free-form pie! Here’s a step-by-step guide to making this easy fall dessert.
Make apple filling
Pull the pie crust from the fridge to soften and preheat the oven to 375 degrees F. Line a baking sheet with parchment paper and set aside for now.
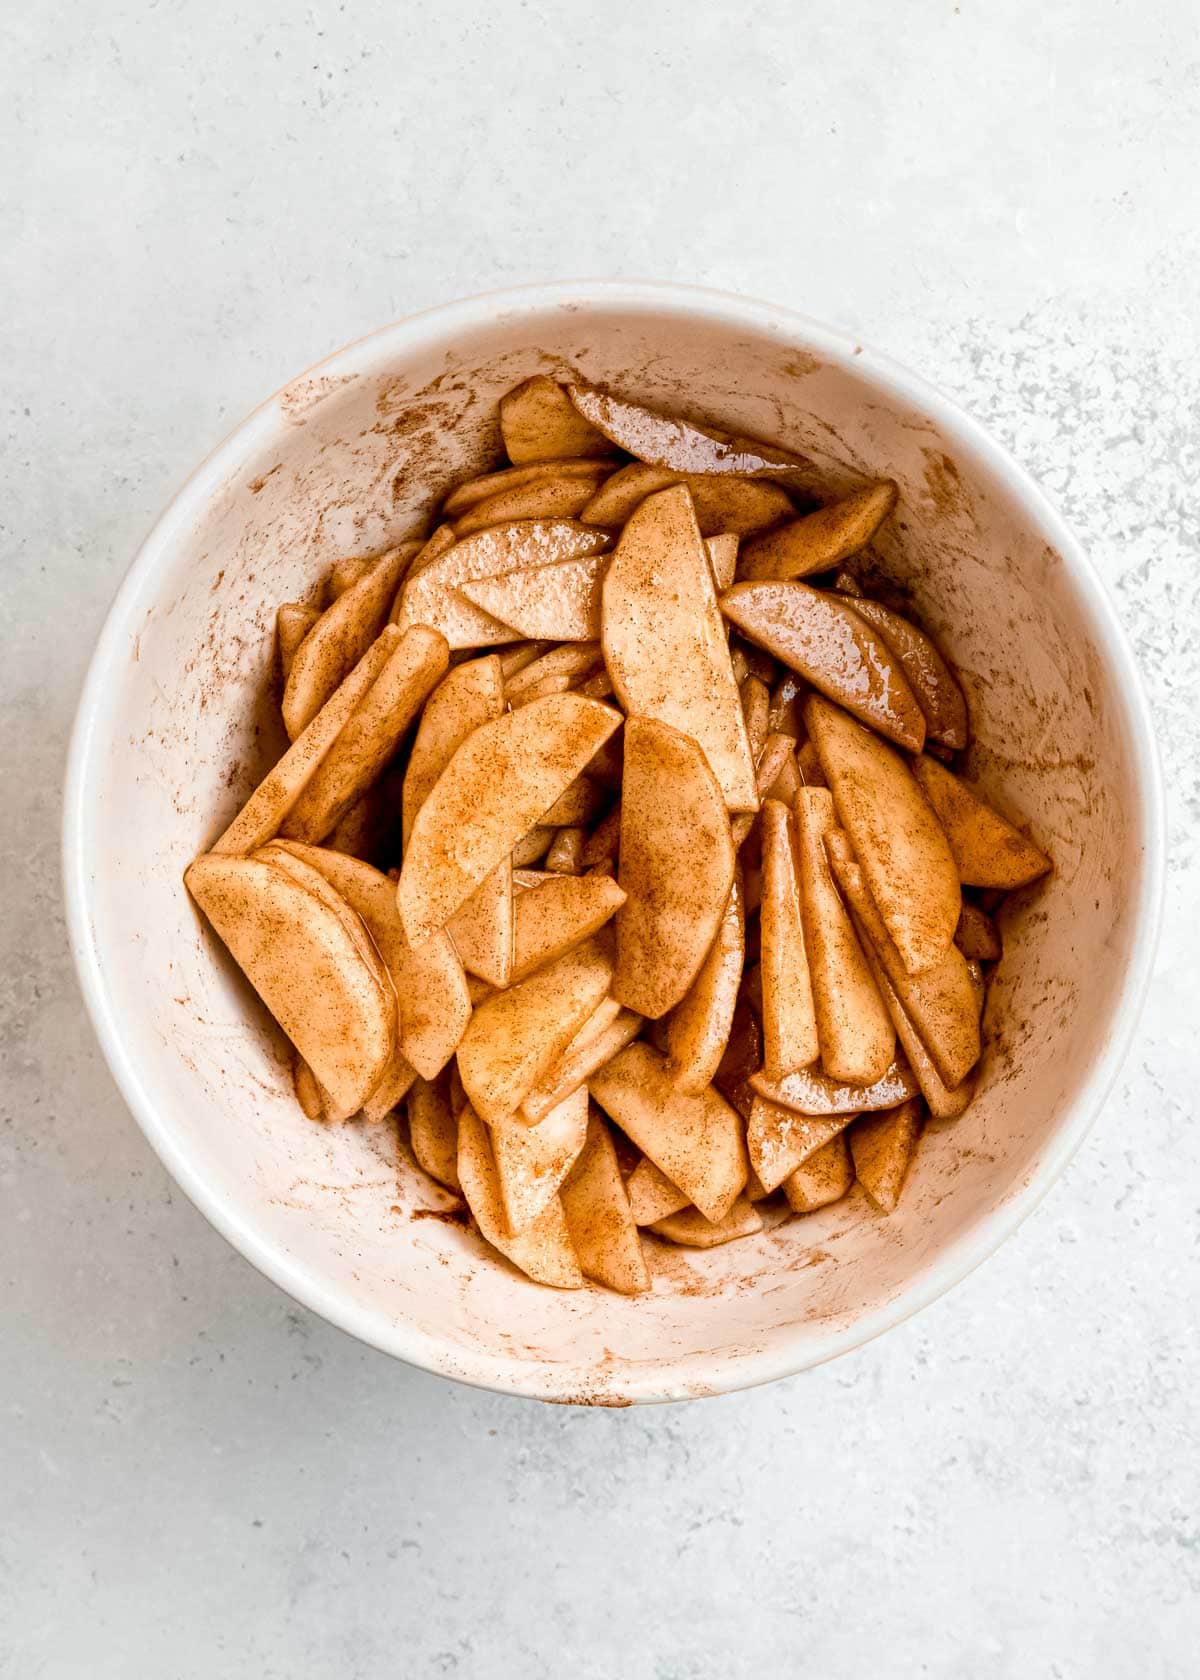
In a mixing bowl, combine apples, brown sugar, lemon juice, cornstarch, cinnamon, and salt. Toss to combine and coat all the apples.
Assemble
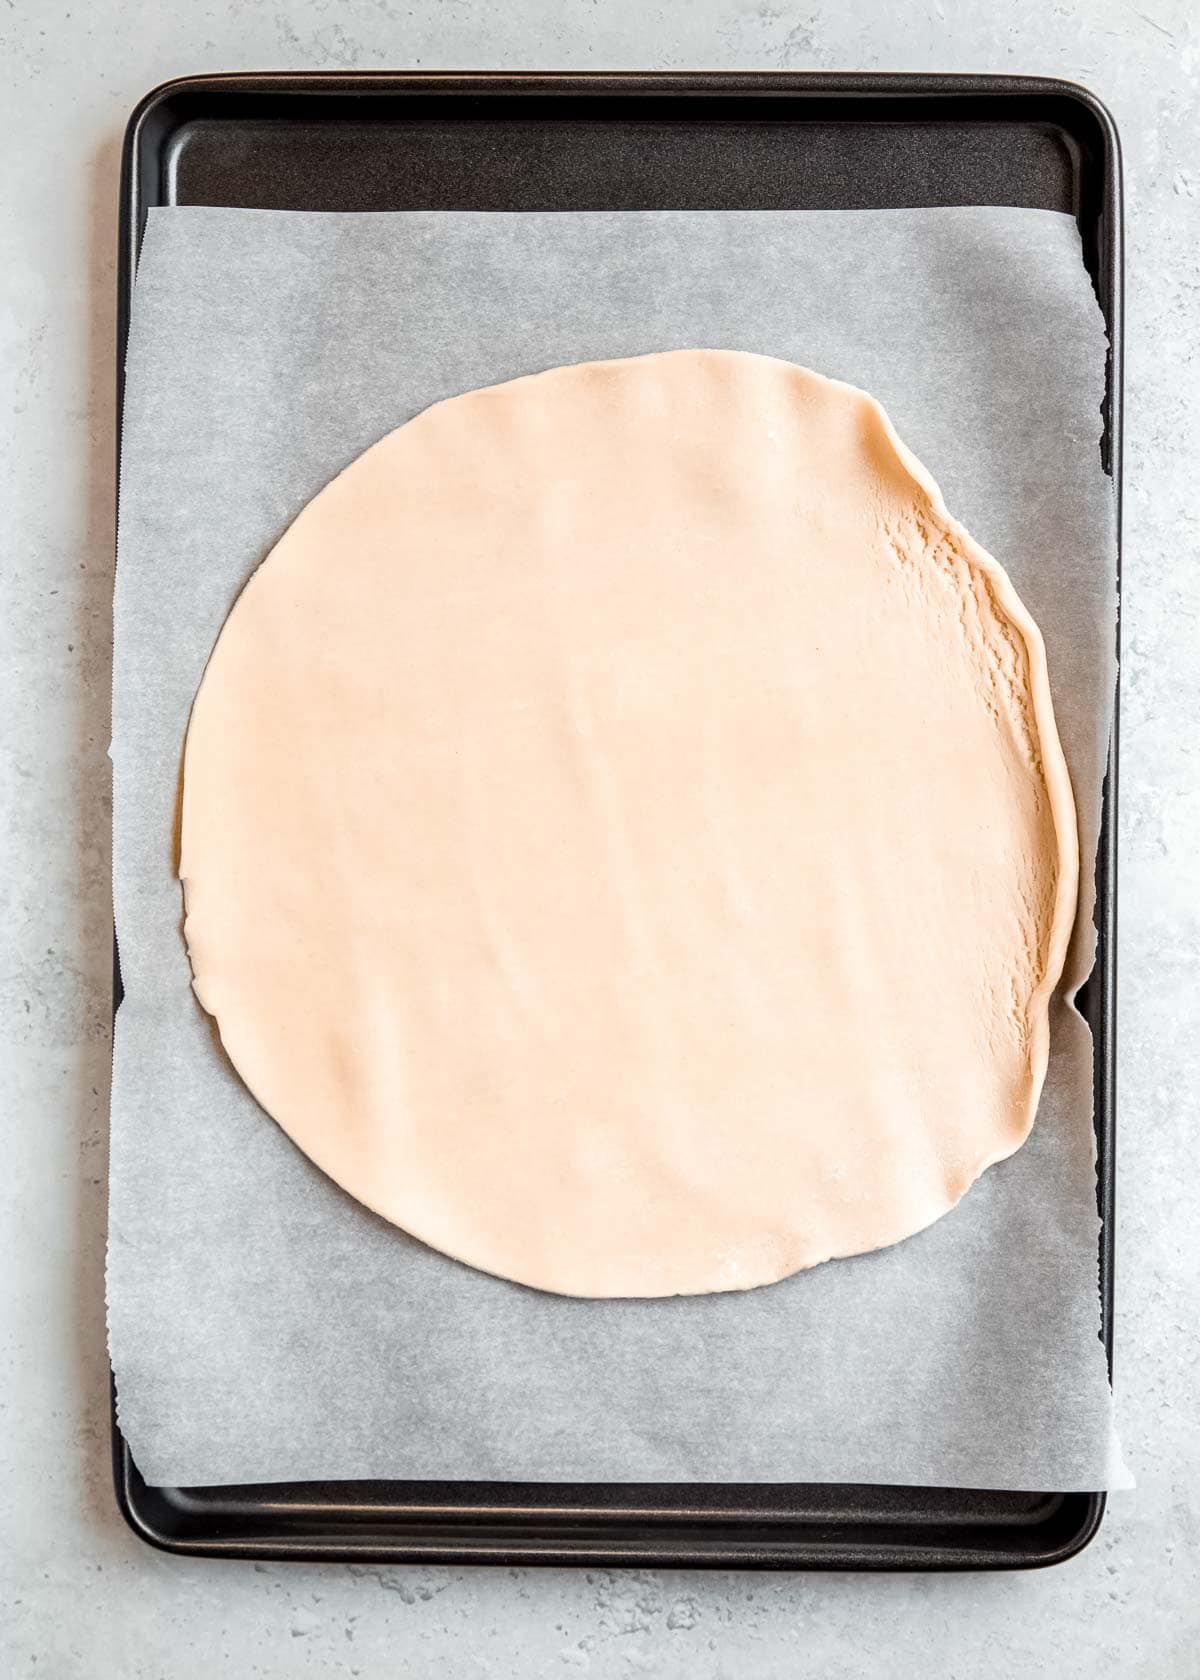
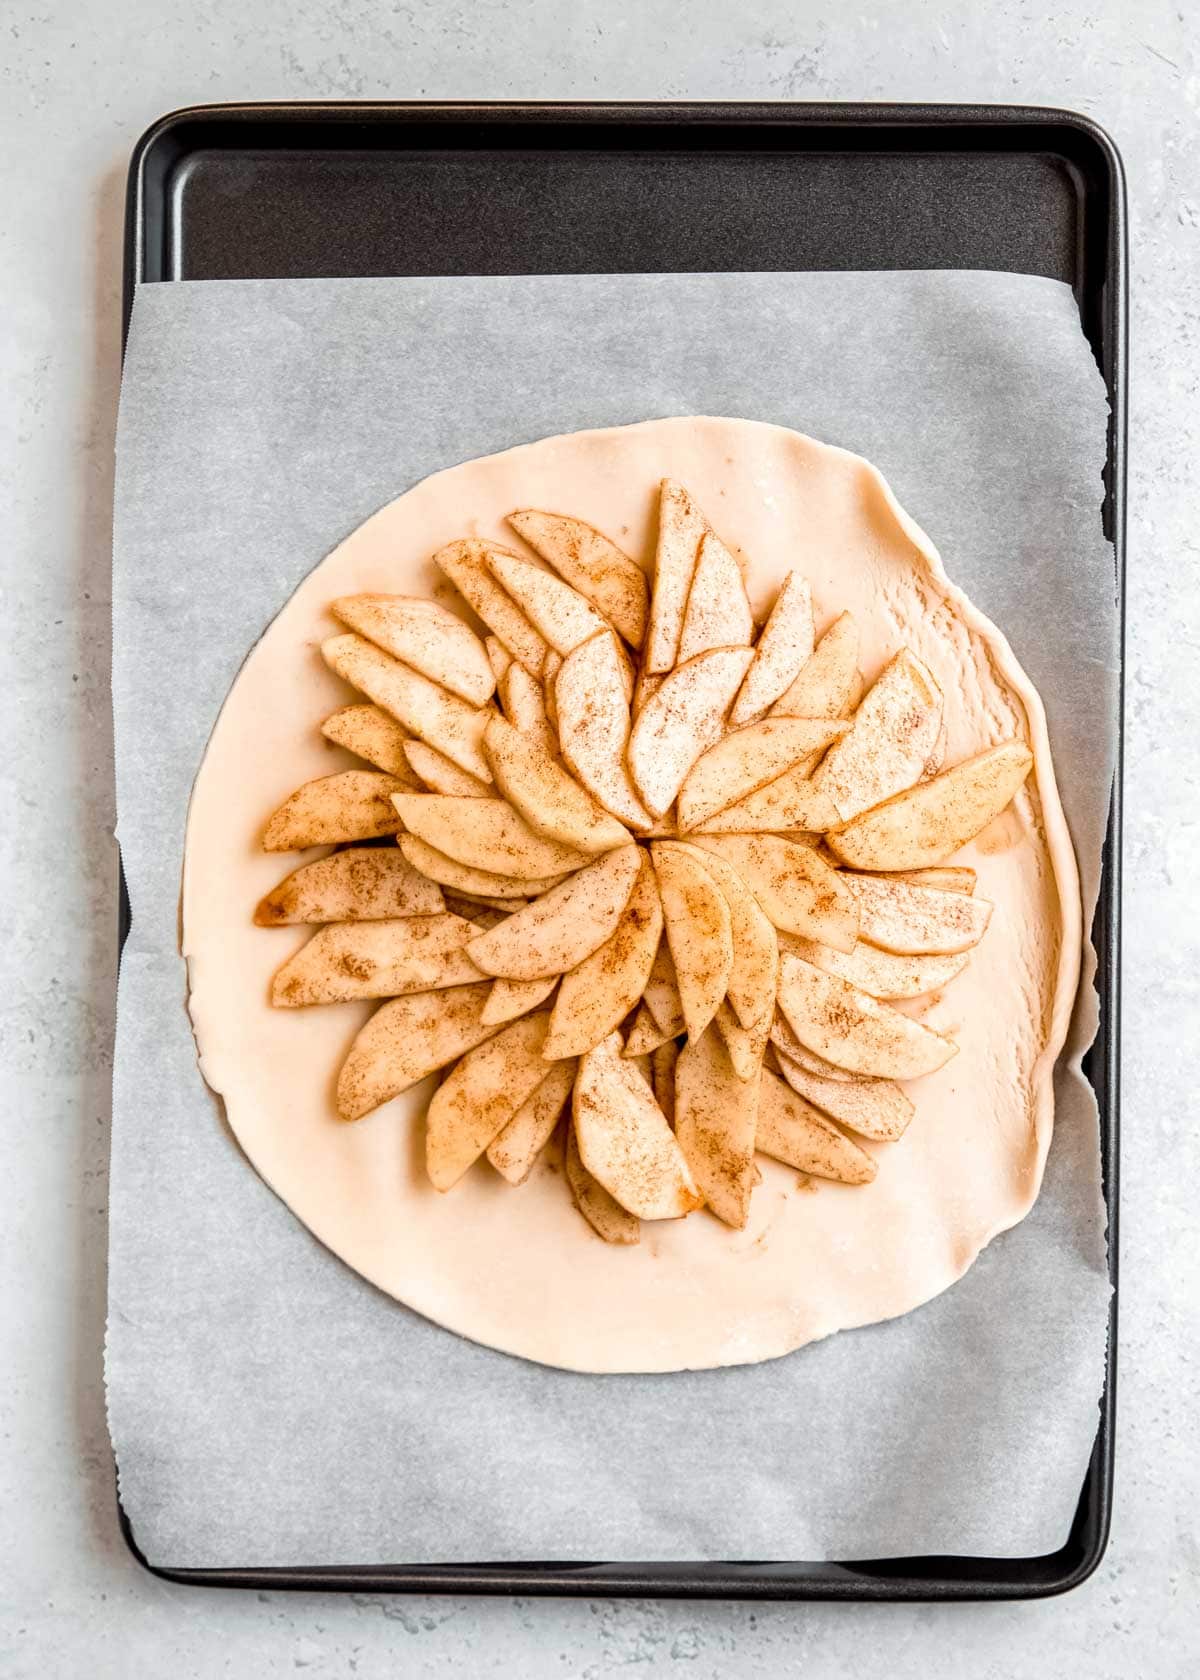
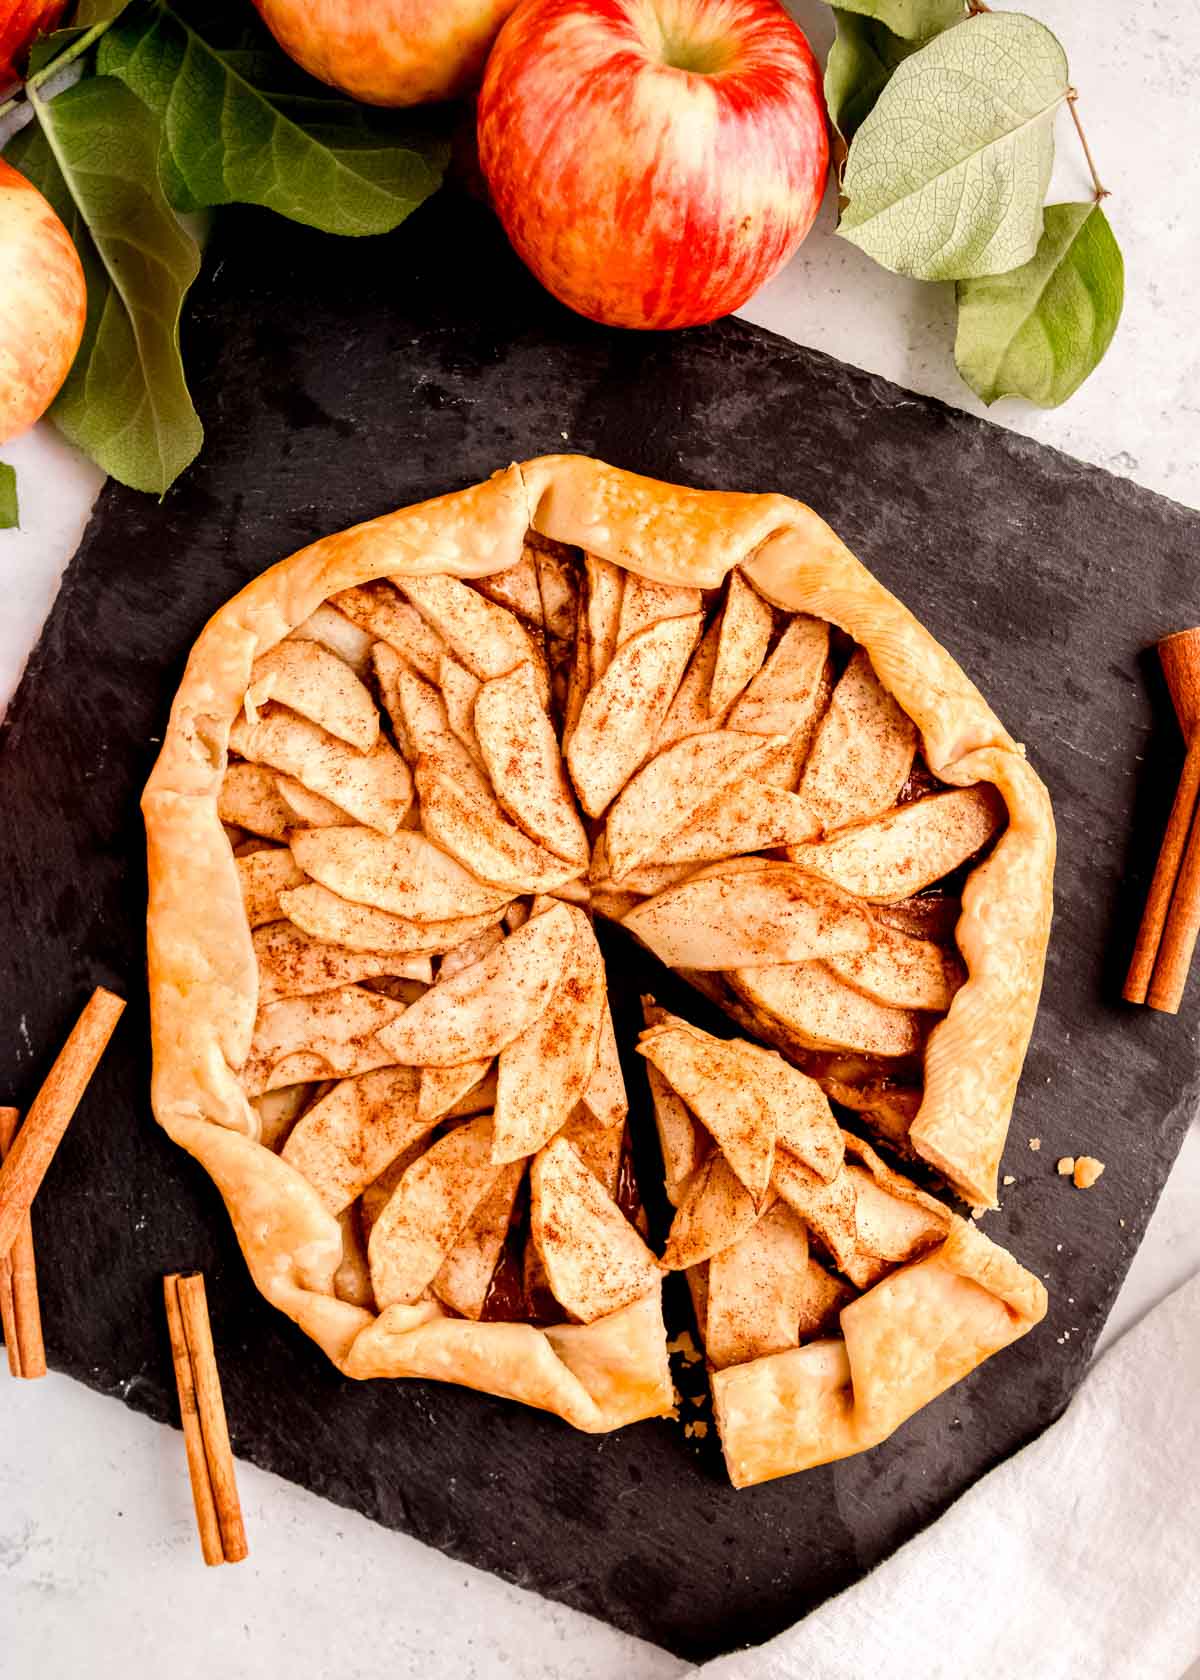
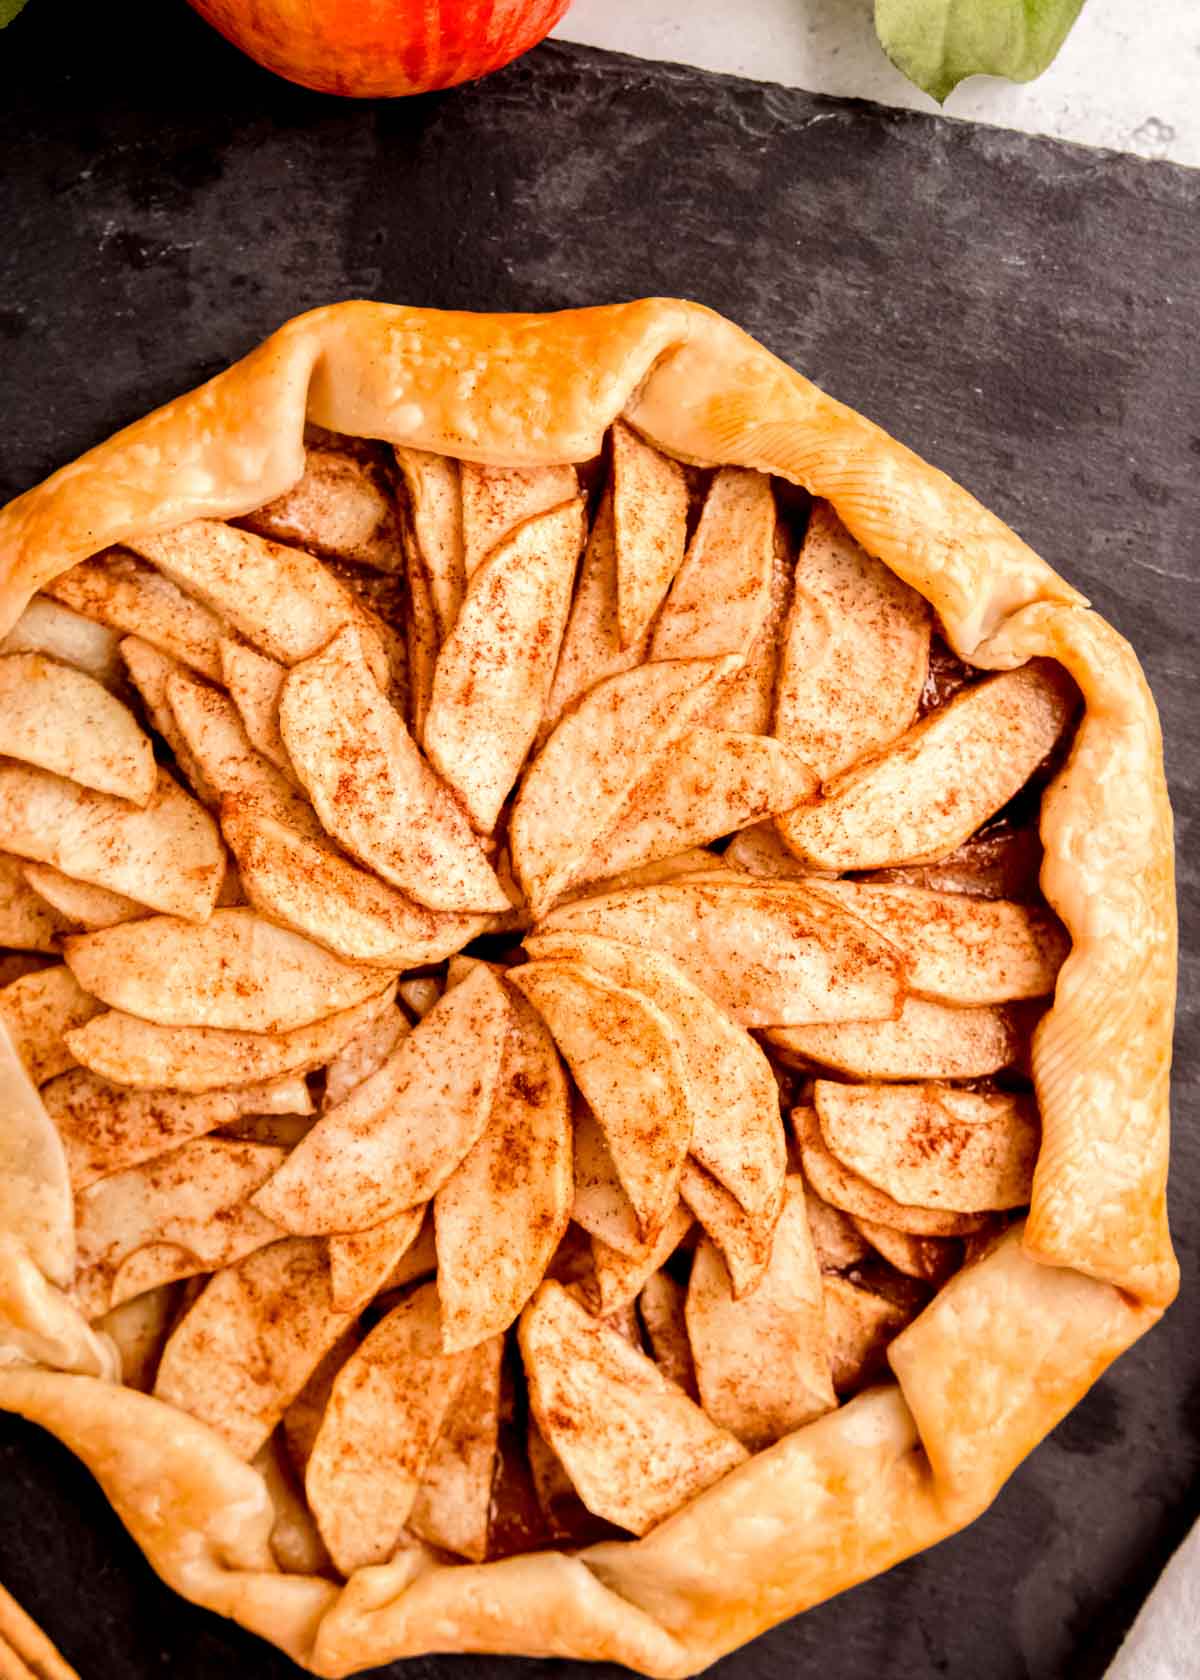
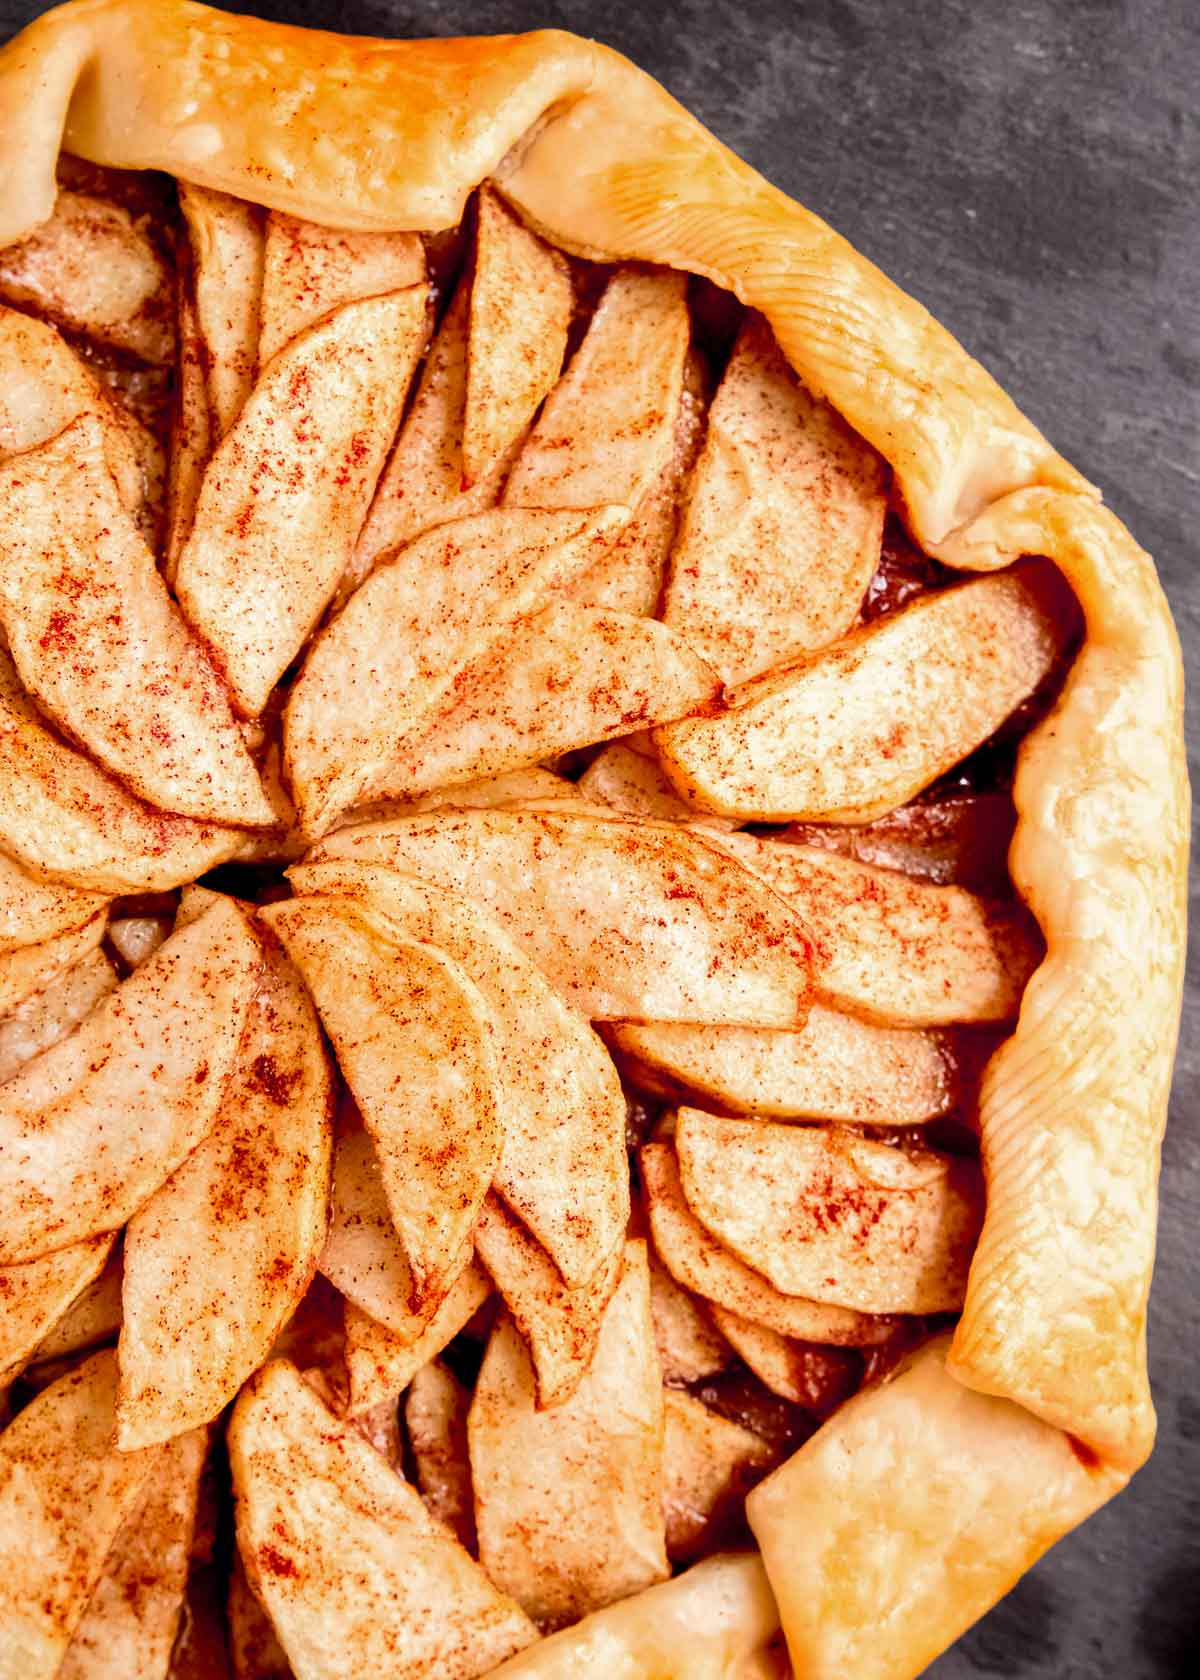
Roll your pie dough out onto the lined baking sheet. Arrange the apples in the middle of the dough, making sure to leave space 2 inches from the edges all the way around. You want the apples in a nice, even layer. These won’t shift as it bakes, so you can create a fun pattern if you would like!
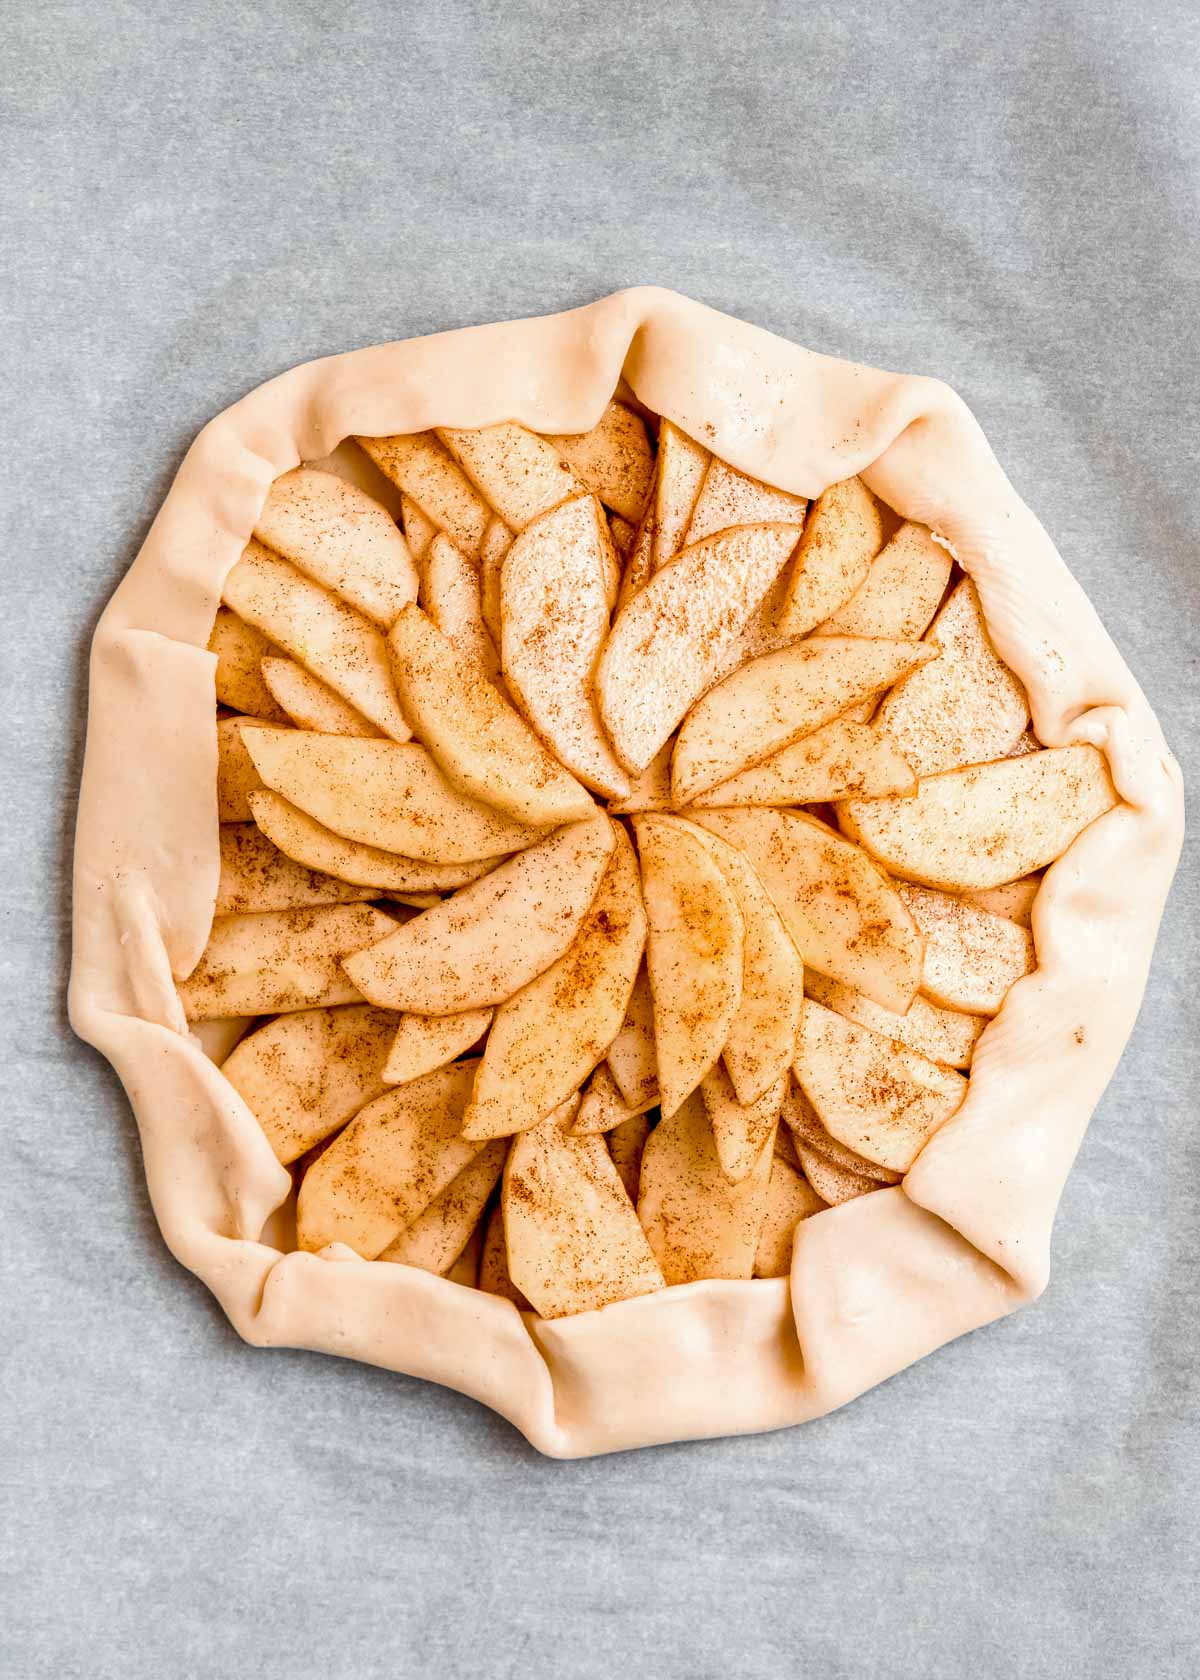
Gently fold the edges (remember, those 2 inches of space you left) over the apples. Do not stretch it or press it down into the apples. Galettes are meant to be rustic, and the imperfect crust is a part of the charm.
Egg wash & finish
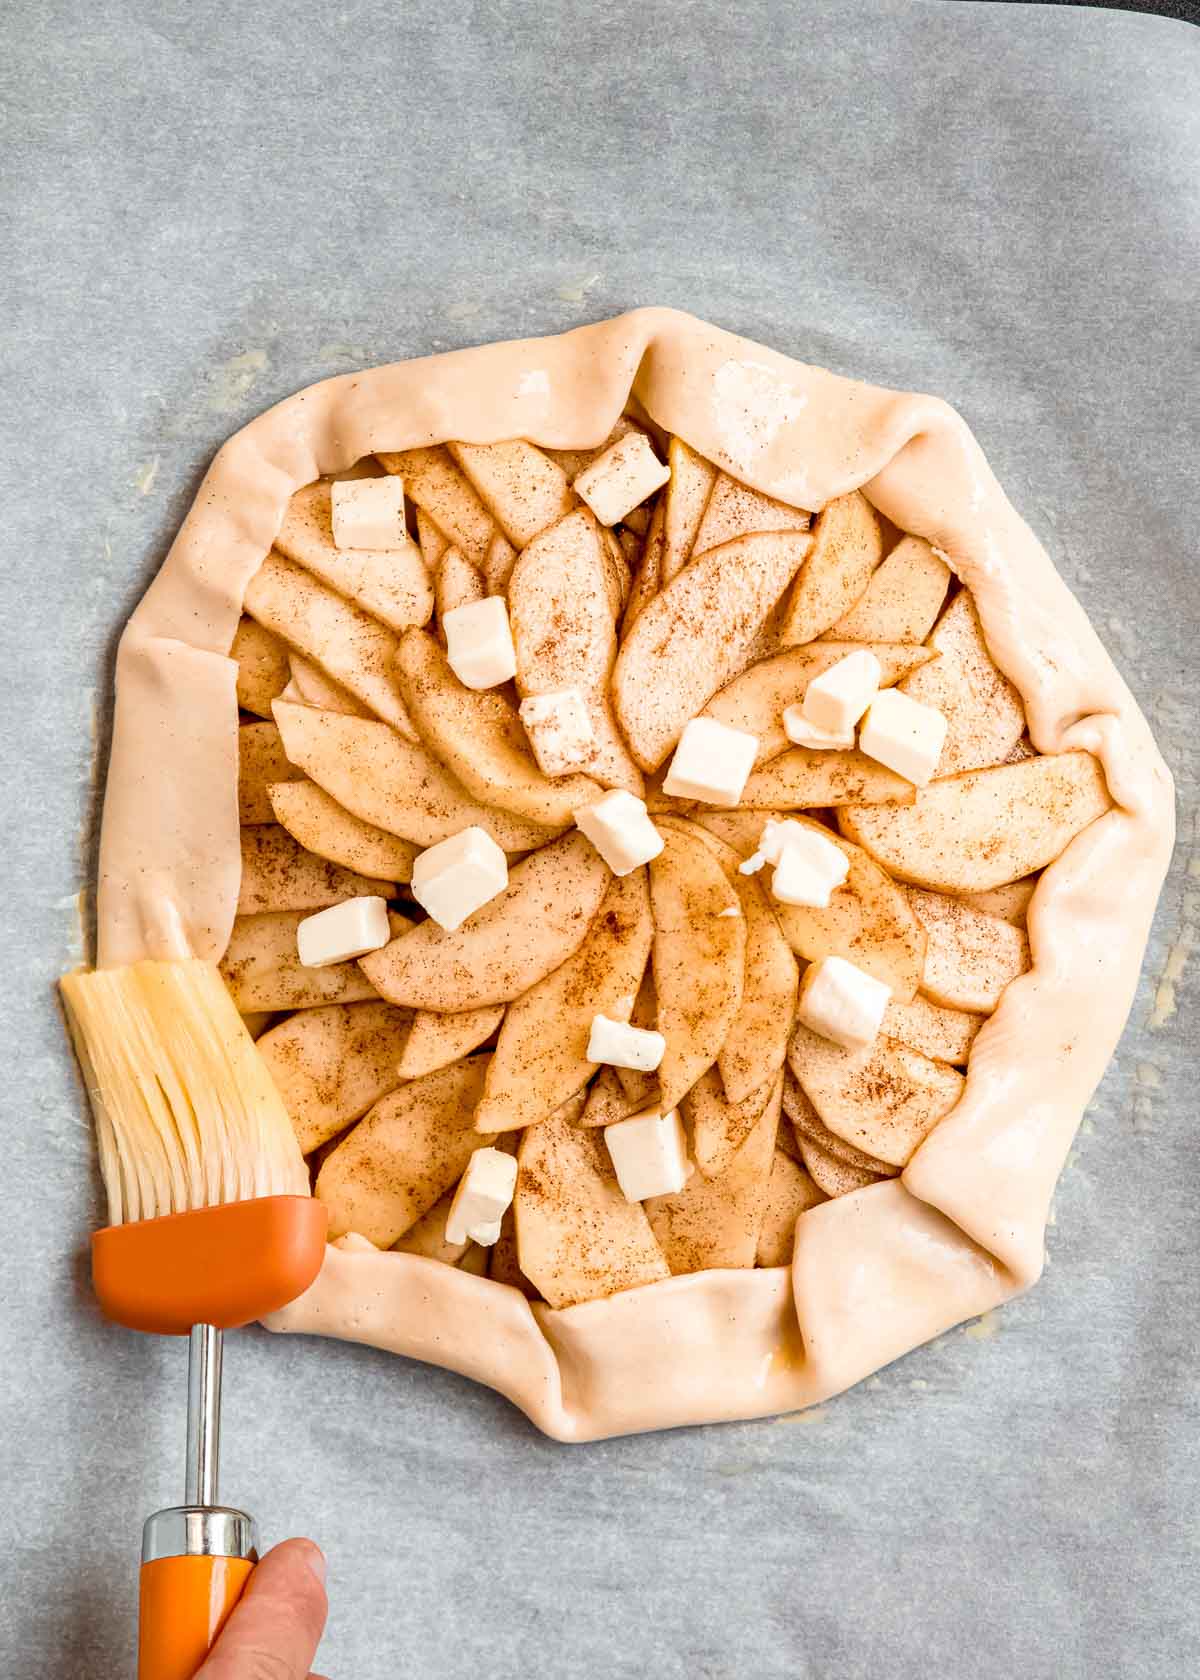
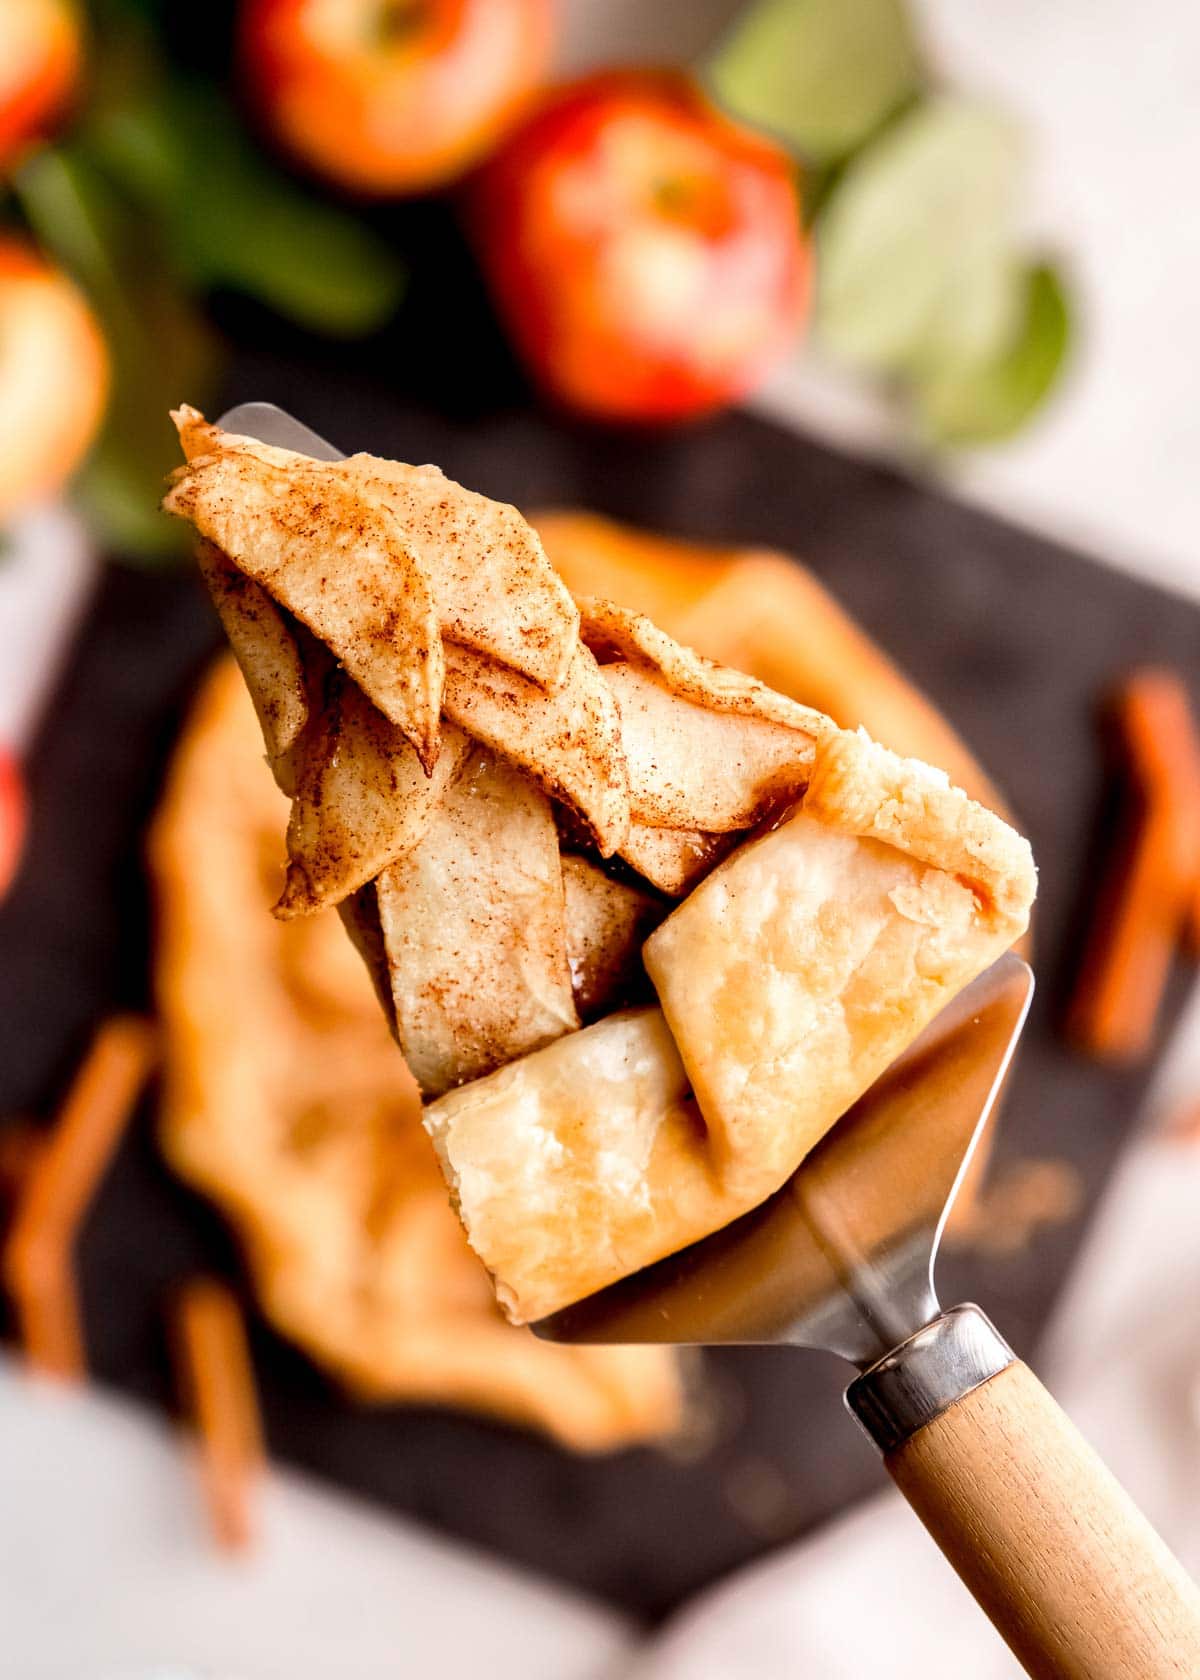
In a small bowl, mix together the egg and cold water for an egg wash. Gently brush this mixture over the folded crust and all the edges. Sprinkle the cubed butter over the apples evenly.
Bake
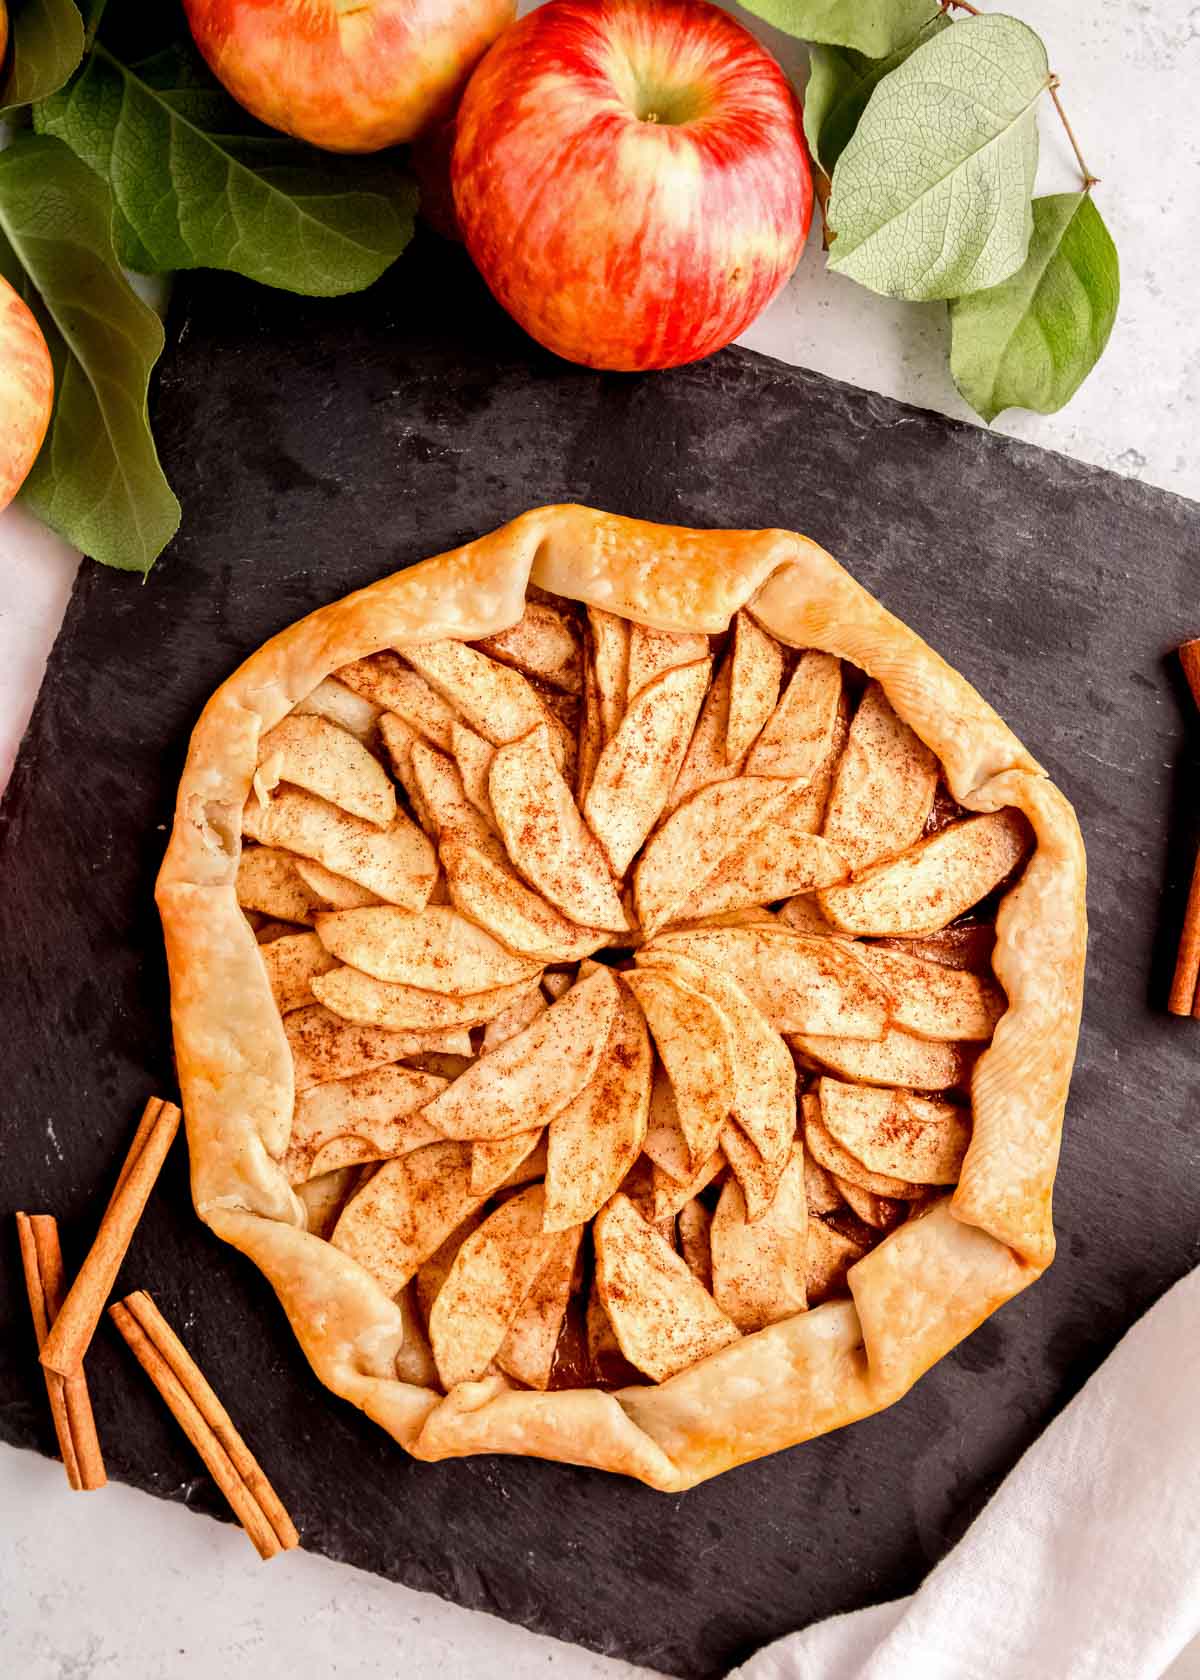
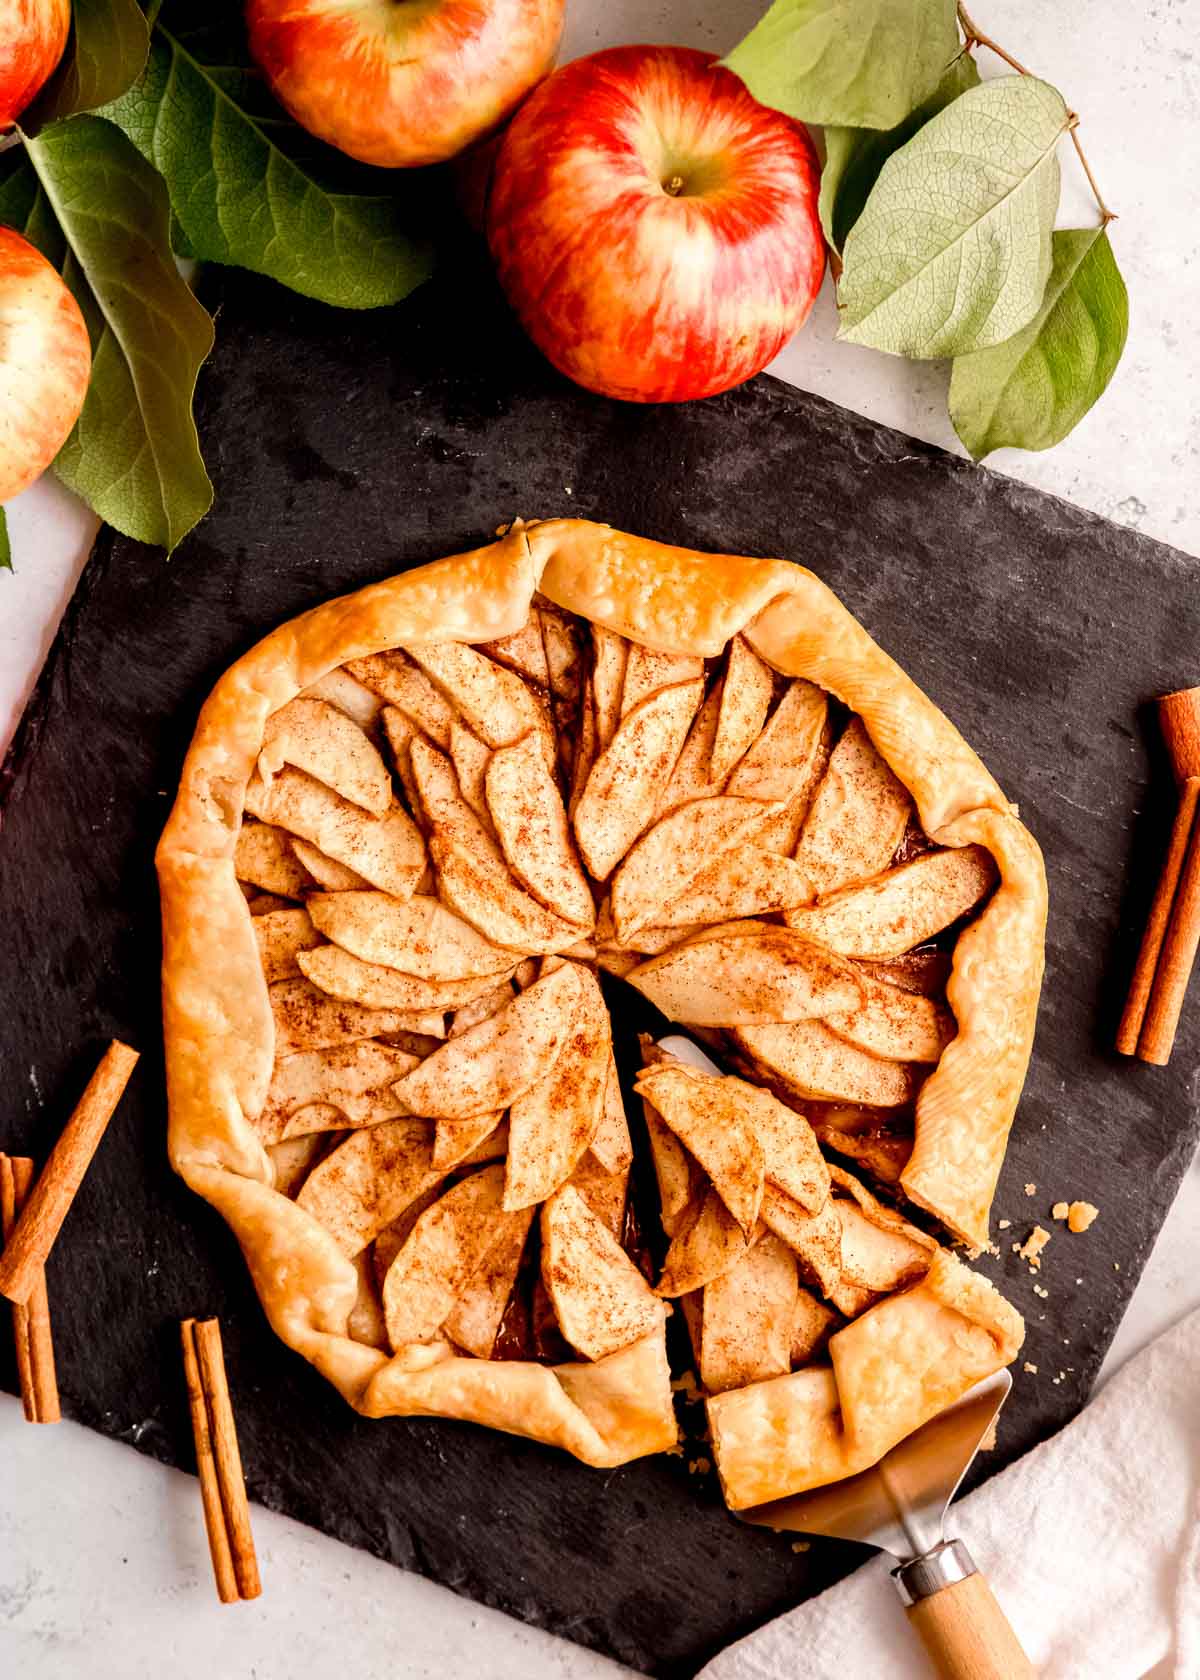
Bake for 40-45 minutes. When the galette is golden brown and the apples are cooked through, remove and allow to cool. After about 30 minutes, slice and serve!
How to Serve Apple Galette
Some people prefer fruit galettes hot, some love them warm, and some enjoy them cold! For this apple version, I love allowing it to cool to just slightly warm. Serve with a scoop of vanilla ice cream, a dollop of whipped cream, or even a drizzle of caramel syrup!
Store
Allow your galette to cool completely, then wrap in foil and store it at room temperature up to 3 days. I wouldn’t recommend putting this in the fridge as it will change the texture.
Freeze
You can freeze galettes! Simply allow to cool completely, then wrap tightly in foil and store in a freezer bag. Reheat from frozen within 2 months for the best texture.
Reheat
For the best texture, reheat in the oven (325 degrees) for about 10 minutes (less if already in individual slices). Microwaving it will create a soggy crust, so I don’t recommend it. Add more time if the galette is frozen if necessary.
If you love this galette, check out these easy desserts!
- Chocolate Stuffed Baked Apples – This yummy dessert is so simple, and you don’t even have to chop up or peel the apples! Everyone in the family can customize their own, too.
- Peanut Butter Honey Apple Crisp – This rich, decadent apple recipe is made even better with luscious peanut butter! Also amazing with a scoop of ice cream.
- Banana Pudding Bites – This is a year-round dessert that everyone loves! Perfect for making ahead of time and storing in the fridge, too.
- No Bake Cheesecake – We love this one around the holidays because it’s one less thing taking up the oven! Great for bringing to parties and potlucks.
- Butter Pecan Blondies – Add a dash of cinnamon to make these really hit right during Autumn! These buttery bars are always quick to go at get-togethers.

Get the Recipe: Apple Galette
Ingredients
- 1 pie crust, can be regular or gluten free. Should be the kind you roll out, not the kind already pressed into a pan
- 3 medium red apples, peeled and sliced into ¼ inch slices
- ¼ cup brown sugar, packed
- 1 tbsp lemon juice
- 1 tbsp cornstarch
- 1 ½ tsp cinnamon
- ¼ tsp salt
- 1 large egg + 1 tbsp cold water, for egg wash
- 2 tbsp unsalted butter, cut into small cubes
Instructions
- Preheat oven to 375 degrees and line a baking sheet with parchment paper. Pull your pie crust from the fridge to soften while you make the filling.
- Combine apples, brown sugar, lemon juice, cornstarch, cinnamon, and salt in a large bowl, tossing to combine and coat the apples.
- Roll your pie crust out onto the lined baking sheet. Arrange the apples in the middle of the dough, leaving space 2 inches from the edges all the way around.
- Gently fold the edges of the dough over the apples all the way around (don’t press the dough into the apples).
- Whisk together the egg and cold water and gently brush the egg wash over the edges of the galette. Sprinkle the cubed butter over the apples evenly.
- Bake in the preheated oven for 40-45 minutes, or until the galette is golden brown and the apples are cooked through. Allow to cool at room temperature for about 30 minutes, then serve!
Notes
- Deliciously served with whipped cream, caramel sauce, and/or ice cream!
- This is basically like an apple pie, only served without the top crust and much less intensive.
- I used honey crisp apples but gala, fuji, and even granny smith apples would work great. You could also use a combination of apples and pears if you wanted!
- Store leftovers in the fridge for up to 3 days. Best served warm although I did like it cold, too!